
The long-awaited Google Slides audio feature has finally arrived!

We can now insert audio in Google Slides–this can be voice, music, narration, sound effects, any type of audio you have access to or want to create.
For many years, teachers have been asking me how to add audio–usually narration or background music–to Google Slides.
Google has heard our request and we now have a new menu option: Insert > Audio! Hooray!
There are so many ways that we can use this feature in our lesson plans and student projects.
If you are looking for project ideas, be sure you take a look at my previous post: 25 Ways to Use Audio in Google Slides.
Currently, this feature is only available on the desktop version of Google Slides.
How to Insert Audio in Google Slides! Hooray! We can finally add narration, background music, or any type of audio we want! #gsuiteedu #shakeuplearning
Click To TweetBelow is a YouTube video tutorial. Keep reading to see all the steps (and tips) in the blog post as well.
Keep in mind, this feature allows us to INSERT audio, not create the audio file itself.
The file must be an .mp3 or .wav file type.
You can insert audio clips, sound effects, or music if you own the file and have the rights to use it.
(Remember to respect copyright and fair use policies when using audio files created by someone else, and use this as an opportunity to talk with your students about good digital citizenship!)
Since Google Slides doesn’t provide you with a recording option, you will need to use a separate application to record the audio file and save it to your Google Drive.
Here are a few apps to try for audio recording: Online Voice Recorder (web-based, no sign-in), Audacity (Mac or PC), or GarageBand (Apple only).
A simple search in the Chrome Web Store will also help you find many other options, particularly for Chromebooks.
Once you have located or created your audio, you are ready for the next step.
If you already have an audio or music file you want to use, be sure it is saved to your Google Drive.
To upload and store files in Drive, go to Drive, click on the NEW button, and select FILE UPLOAD.
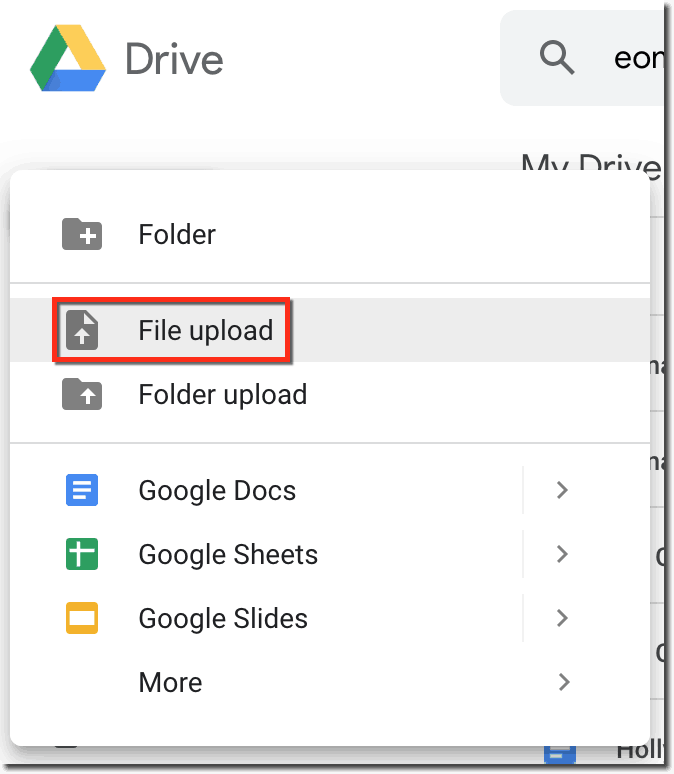
Don’t forget! If you are sharing this slide deck with your students or anyone else that will need to play the audio file, the audio must be shared separately from Google Drive.
Right-click on the file from Google Drive, and click on Share.
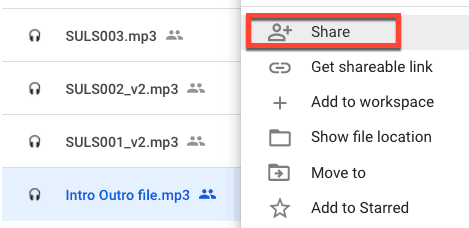
Share this file so that at least anyone with the link can view. Learn more about sharing in the Guide to Google Drive Sharing.
If you forget to share the audio file, students will not be able to play it.
h3>STEP 2: Insert audio into your Google Slide
Open your Google Slides file or create a new one.
(Tip: Type in Slides.new to create a new slide deck quickly.)
Select the slide where you want to insert the audio file.
Then go to INSERT>AUDIO
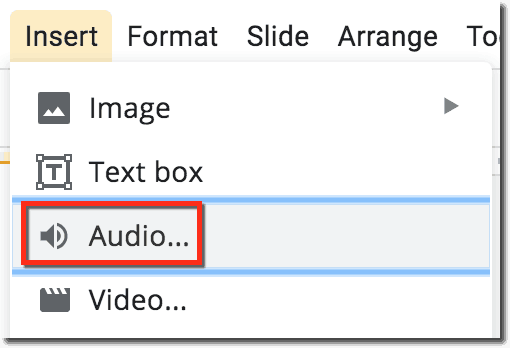
Select the file from your Google Drive.
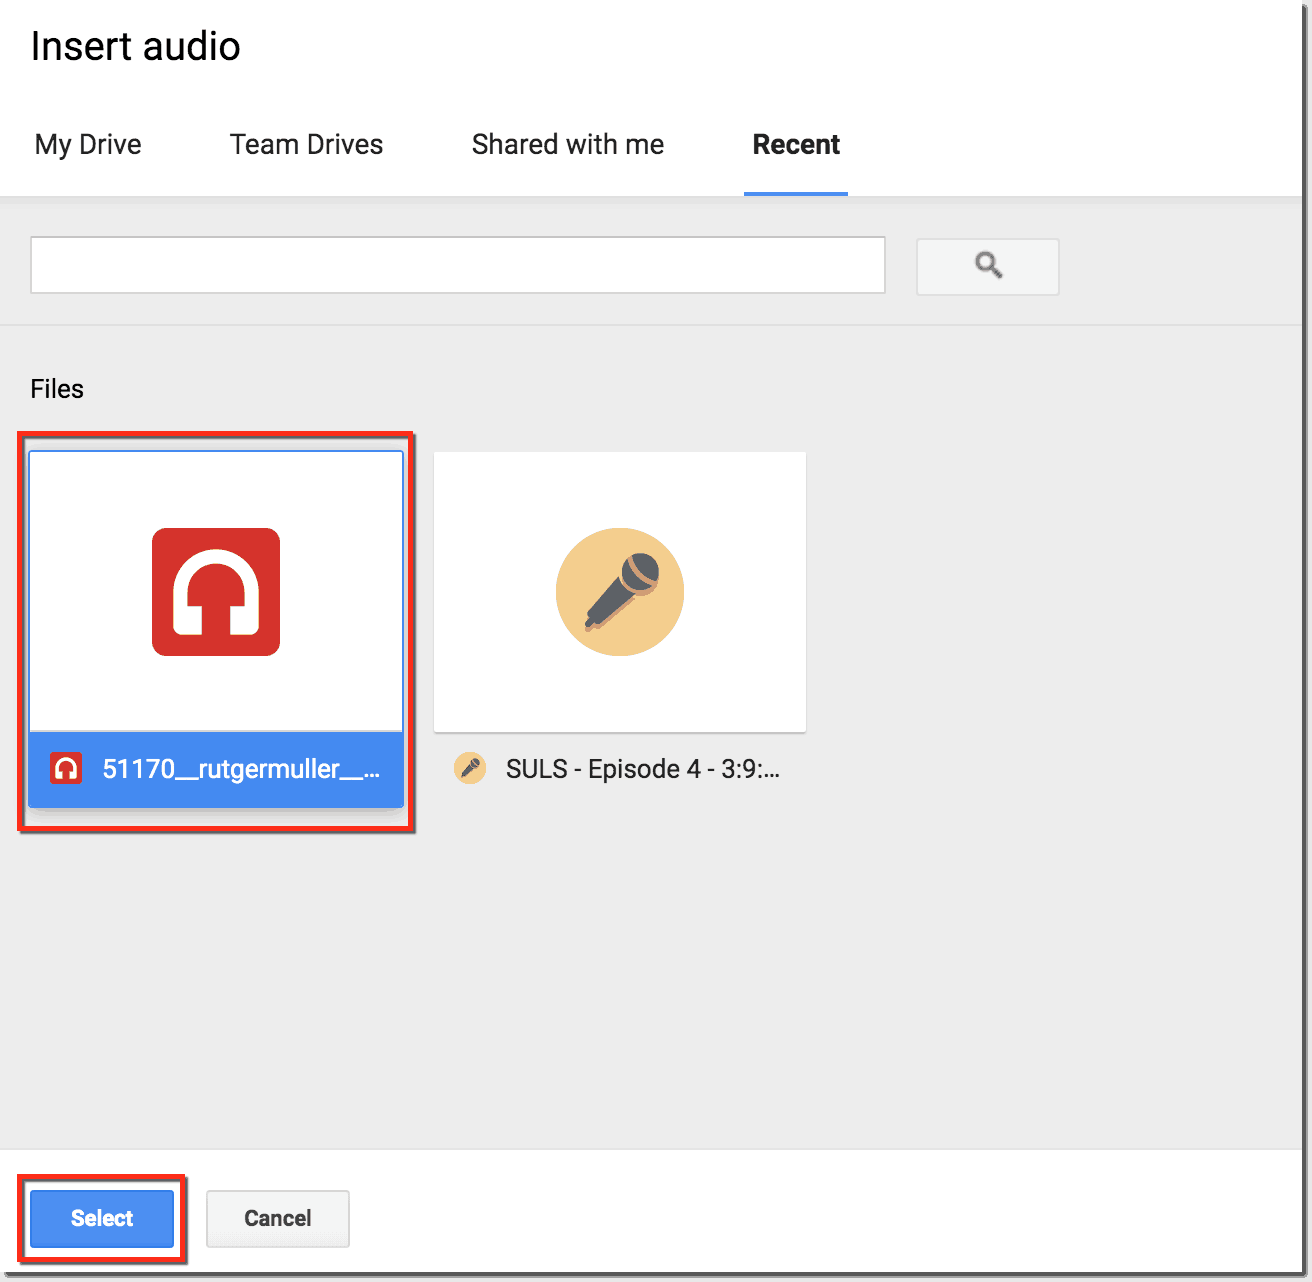
After you click SELECT, a speaker button will appear on your slide. Click on the icon to play the audio or move the button anywhere you like on the slide.
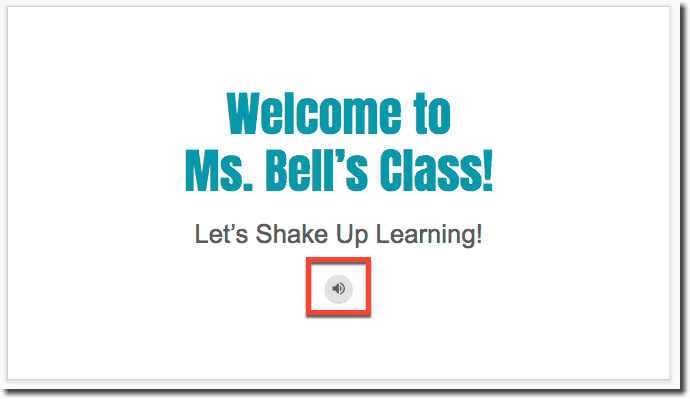
There are a few adjustments you can make to your audio file once it is inserted in the slide.
This is similar to the options you see with videos as well. (CLICK HERE to learn more about video options in Google Slides.)
When the speaker icon is selected (has the blue bars), you can click and drag to place it where you want.
You can also click on FORMAT OPTIONS in the toolbar. (This contextual menu will only appear when the object is selected.)
A sidebar menu will appear that will give you some playback options.
(The screenshot below are the default settings.)
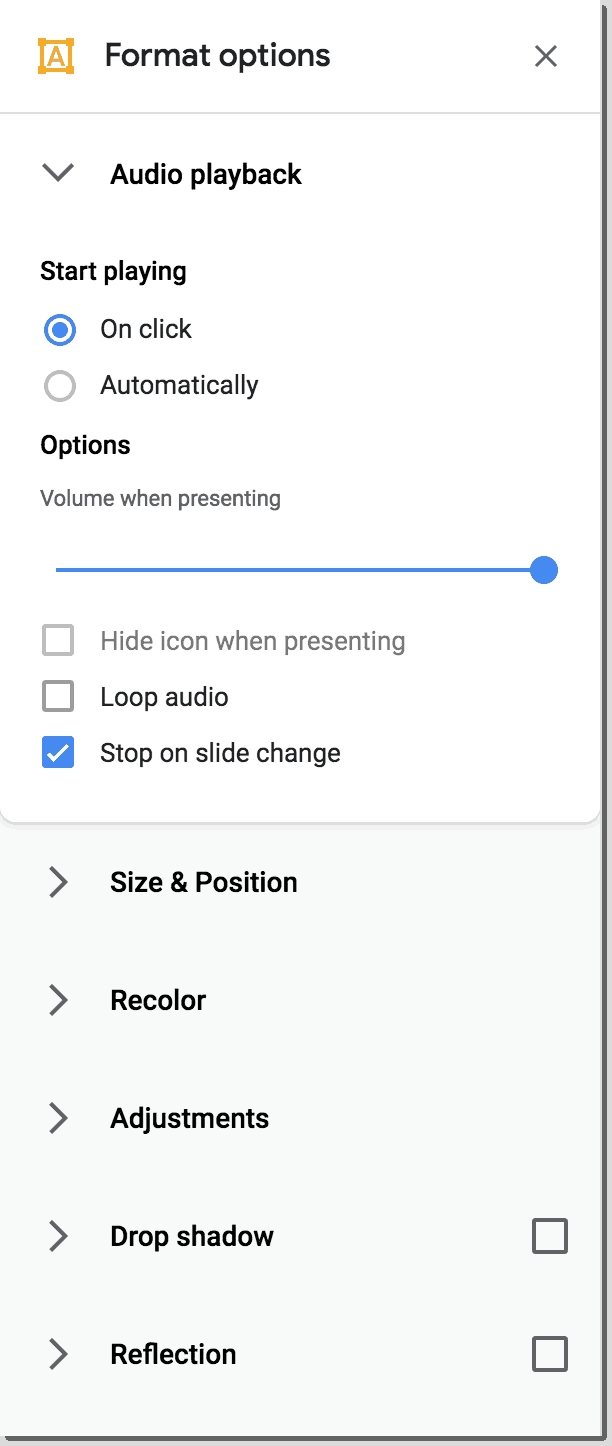
You can choose to have it play “on click,” or to play automatically when you present that slide.
If you choose to have it play automatically, you can also hide the icon because most likely, you won’t need to see it on the screen.
You can also adjust the volume level of the audio.
You can choose to have the audio loop so that it plays over and over again.
And last, but not least, you can uncheck the box that says “Stop on slide change,” and this will allow the audio to continue to play when you change slides.
You can preview the audio and play while you are in editing mode by hovering over the speaker icon or clicking on it to select it and then click play.
When you are in presentation mode, you can click on the speaker button to play the audio, or just hover and click the play button.
I frequently refer to Google Slides as the Swiss Army Knife of the G Suite tools because it is capable of being so much more than a presentation tool. In this course, you will learn how to use Slides in new and unexpected ways in your classroom that will engage your students and make learning more dynamic!
K-12 teachers are going to LOVE THIS COURSE!
This class is perfect for beginner to intermediate users to take their skills to the next level and become a Google Slides Master!
(Prerequisite: basic knowledge of slides, how to access and create new slides.)
© Shake Up Learning 2023. Unauthorized use and/or duplication of this material without express and written permission from this blog’s author and/or owner is strictly prohibited. Excerpts and links may be used, provided that full and clear credit is given to Kasey Bell and Shake Up Learning with appropriate and specific direction to the original content on ShakeUpLearning.com. See: Copyright Policy.